Learn how to do facial at home by using simple ingredient available at home.
The best thing about homemade facial is that it is free harmful chemicals.The result is long lasting without any side effects.
When it comes to a perfect facial, there are only some of us who can resist it, but before you go for a facial it is important to know your skin type and the facial which suits you.
Not all facials are meant for all skin types. There are a variety of facials available such as chocolate facial, fruit facial, gold facial and much more.
Facials should be done twice a month and not more than that. Following this routine will not only help to improve your complexion and blood circulation but will also relieve tension.
So tighten up your seatbelts because I am taking you on a tour of a perfect facial. This tour will contain five stops namely cleansing, exfoliating, steaming, mask and moisturizing. Before beginning, get the ingredients, tie your hair tightly backward and then start.
Table of Contents
Steps For A Perfect Facial At Home
1. Cleansing
To begin a facial Firstly, you have to cleanse your face. By cleansing, you remove any makeup, dust and grease present on the face.
Facial cleaners are available in the market for different skin types.
If you are using an artificial cleanser, then make sure that your cleanser is oil free if you have oily skin and it is milky or creamy if you have dry skin.
For natural cleansing, milk is the best option. Take cotton, dip it in milk and remove all the dirt from your face.
Move your hands in an upward circular motion. This promotes the natural blood circulation. Rinse your face with water.
2. Exfoliating
Exfoliating is a process to remove dead skin cells and any dirt left on the surface of the skin. You can use an artificial or a natural homemade scrub depending on your skin type.
All you need to do is take sufficient amount of scrub on your palm, spread it evenly and start applying it to your damp skin.
Massage all over the face is avoiding sensitive areas like the area around the eyes. Dead cells mainly cover your forehead, nose, and chin, so try to target those areas.
Exfoliating not only helps in removing dead skin cells but also helps in removing blackheads. It reduces large pores, fine lines, and wrinkles on your skin and maintains an even skin texture.
3. Steaming
Steaming helps in opening the pores present on the skin. It also helps in releasing toxins and impurities that build upon the skin due to pollution and dust.
There are many methods for steaming; I will tell you the basic and the simplest one.
- Take water in a big vessel and boil it.
- Once steam starts rising, stop boiling.
- Take a medium sized cloth or a towel and cover your head and the vessel with steam i.e. form a tent over your head.
- Lean forward over the vessel so that your face is exposed to the steam.
- For increasing the benefits, you obtain by this method add some rose petals or lavender to the water. You can cook for 10-15 minutes but not continuously.
- Make sure that you leave gaps in between while you take steam. Otherwise, you won’t like the results!
Finish off by washing your face with cool water or you can use the icing technique. It’s very simple, just take a few ice cubes and massage your face with it. It gives a soothing effect.
If you have a sensitive or a problematic skin, then I would suggest you consult your skin specialist before facial steaming. Also, handle the hot vessel carefully as it might be dangerous.
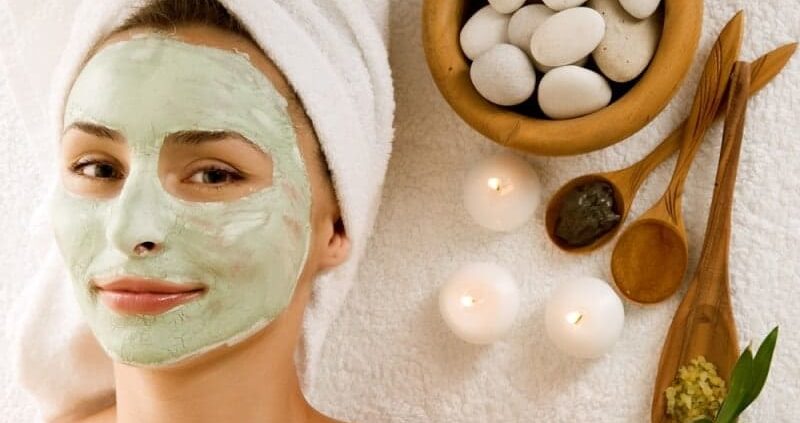
4. Facial Mask
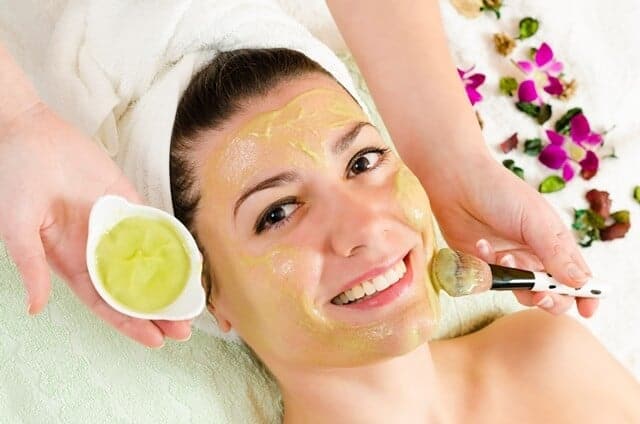
We have reached the fourth and the second last stop of our tour. Here you have to apply a mask over your face.
- Keep cucumber slices or you can use cotton dipped in rose water on your eyes and just relax.
- Apply the pack evenly on your face.It will take about 15 minutes for your pack to dry; it may take more time depending on the pack.
- After the pack dries out, wash it off with plenty of water. You can even use a sponge for easy removal, just soak the sponge in water and wipe your face with it.
Be careful while selecting the pack for your skin. Depending on the skin type I would strongly recommend a creamy or a hydrating mask for dry skin, mud or clay mask for oily skin as it absorbs oil and a light gel mask for sensitive skin.
Skin type may also be a combination of other types, for those skin types more than one masks may be required.
5. Moisturizing
Finally, after all, these processes your skin needs some moisture. So moisturizing is necessary for all types of skin, but the moisturizer has to suit your skin type.
You can either use an artificial moisturizer, or you can make one at home by any of the home-made recipe discussed later in this article.
Avoid moisturizers containing fragrances or any kinds of acids.
For dry skin prefer a thick, oil-based moisturizer while for oily skin prefer using a light, water-based one.
By moisturizing, you protect your skin from the daily wear and tear and also maintain its texture.
Well, this is how you perform a facial at home. Now I am going to share some recipes using which you can make your cleanser, mask, and moisturizer by using things you use in daily routine.
This will form a completely natural home facial with hardly any chemical side effects and numerous benefits.
Types Of Home Made Facial
There are many types of facial available for perfect skin. Some are home-made like fruit facial, and some are artificial like gold and pearl facial. Here in this
Here in this section, we will be discussing all the three. Let’s start with fruit facial.
1. Fruit Facial
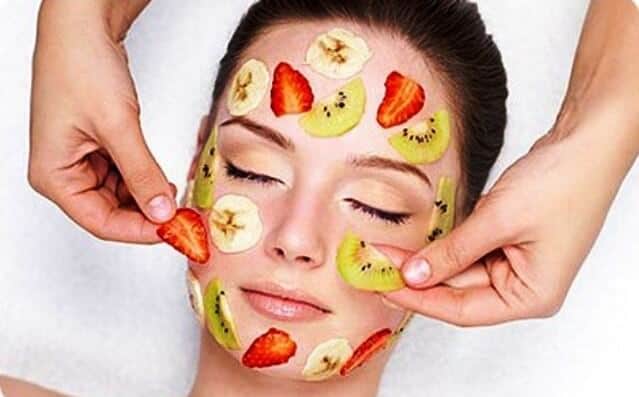
The outcomes of a fruit facial are as delicious as its name. It is one of the rarest kind of facial which suits all skin types.
It provides you with all the goodness of nature without any side effects. It is known for its ability to provide an instant glow.
The secret behind all this goodness is that different fruits have different benefits, and you can customize your fruit facial according to your needs.
The step by step procedure for fruit facial is given below:
1.Cleansing
First cleansing is done following the normal procedure; you can use milk or any fruit face wash.
2.Exfoliating
For exfoliating, you can use the fruit scrub containing the fruit which suits your skin. Orange or lemon scrub is used for oily skin, peach and strawberry for sensitive and banana scrub for dry skin.
You can prepare these scrubs quickly at home by following the below-given recipes.
How To Make An Orange Scrub?
- Take fresh orange juice (about three teaspoons) and add two teaspoons of oats to it.
- Form a paste by mixing them thoroughly.
- Gently scrub your face using it in a circular motion and leave for 5 minutes.
- Rinse off the scrub and pat the face dry.
How To Make A Lemon Scrub?
- Take one teaspoon of lemon juice, add honey and sugar to it. Mix them thoroughly to form a paste.
- Gently scrub in a circular motion and leave for 5 minutes.
- Rinse off and pat dry.
The Lemon Scrub is an all season scrub. It helps in reducing blemishes and dark spots.
How To Make A Papaya Scrub?
- Take two teaspoons of mashed papaya pulp.
- Add sugar granules (1 teaspoon), oats and honey to it.
- Mix thoroughly to form a paste. Scrub in a circular motion.
- Keep for 5 minutes.
- Rinse off and pat dry.
Papaya scrub is suitable for all skin types but works wonders for oily skin. You can also add olive oil to this scrub. Papaya helps in maintaining the glow of the skin.
How To Make A Watermelon Scrub?
- Take ¼ cup of fresh watermelon juice and mix it with three teaspoons of gram flour.
- After forming a smooth paste, scrub in a circular motion and leave for about 3 minutes.
- Rinse off and pat dry
Even this scrub is suitable for all skin types. It hydrates the skin leaving it to look fresh instantly.
How To Make A Banana Scrub?
- Rinse off and pat dry.
- After 10 minutes, massage it.
- Mix them to form a paste. Apply this paste on your face and leave for 10 minutes
- In 2 teaspoons of mashed banana add two teaspoons rolled oats, one teaspoon milk, and one teaspoon honey.
Fruit Mask
Customize your fruit pack with different fruits which suit your skin type. I will give you some nice combinations
For All Skin Types
Papaya-Lemon Pack
Take the pulp of ripe papaya and add one teaspoon fresh lemon juice to it. Add honey and stir to form a paste. Papaya is a rich source of vitamin C, so it forms a helpful anti-aging pack. It is especially known for skin brightening.
Lemon-Honey-Yogurt Pack
Take a teaspoon of all three ingredients and form a paste by mixing them.
Cucumber-Rosewater-Lemon Pack
- Take a teaspoon of cucumber juice, lemon juice and rosewater.
- Mix them and apply the resultant liquid on your face with cotton.
- It is extremely beneficial for tan removal and lemon in it acts as a natural bleaching agent.
Other Specific Packs For Different Skin Types
Multani-Mitti And Aloe Vera Gel Pack
Take two tablespoons of fuller’s earth i.e. Multani-Mitti and add one tablespoon of aloe vera gel to it. Add rosewater for dilution.
Mix to form a paste and apply on your face. Leave it for 30 minutes and rinse off. When it comes to skin, nothing is better than fullers’ earth. Aloe vera gel helps in lightening the skin tone.
Orange Juice And Yogurt Pack
- Mix one tablespoon of each and apply on the skin using cotton.
- Orange juice is well known for its anti-aging properties due to the collagen found in it.
- It also helps in skin tightening. This pack will leave your skin soft and supple.
Papaya And Honey Pack
In a half cup of mashed papaya pulp add a tablespoon of honey. Mix well and apply on clean face. Rinse after 30 minutes.
Moisturizing
Any fruit moisturizer can be used for moisturizing. Take care while choosing the appropriate moisturizer for your skin. Prefer a cream based moisturizer for normal to dry skin and gel-based for oily skin.
Following are some other homemade recipes you can try for making a cleanser, toner, pack, and moisturizer.
Rose-Cream Cleanser
Ingredients Required
- One tablespoon sour cream
- One teaspoon rose hydrosol
- Two teaspoons extra virgin olive oil
Combine all these ingredients to prepare the cleanser. Don’t store the mixture for more than two days.
Oats & Aloe Scrub
Ingredients Required
1. One tablespoon finely ground oats
2. One teaspoon finely ground almonds
3. One teaspoon honey
4. One tablespoon aloe vera gel
Mix all the ingredients well. Apply this formed mixture on the face and massage in circular motion. Leave for about 5 minutes and then rinse it off.
Creamy Facial Pack
Ingredients required-
1. Two tablespoons white clay
2. Three tablespoons whipping cream
3. One tablespoon rose hydrosol
This face pack is not suitable for oily skin as it contains cream. People with dry skin can try it.
Aromatic Moisturizing Oil
Ingredients Required
- Three tablespoons jojoba oil
- Three tablespoons rose hips seed oil
- Two drops rose essential oil
- Three drops lavender essential oil
- Two drops geranium essential oil
- Two drops palmarosa essential oil
People with oily skin can use three tablespoons hazelnut oil instead of 3 tablespoons rose hips seed oil.These were the natural homemade facial techniques.
Nowadays there are some other popular facials which cannot be prepared at home but can be done at home if you buy their kit. For example gold facial or pearl facial. Given below is the technique used for both of them.
2. Gold Facial
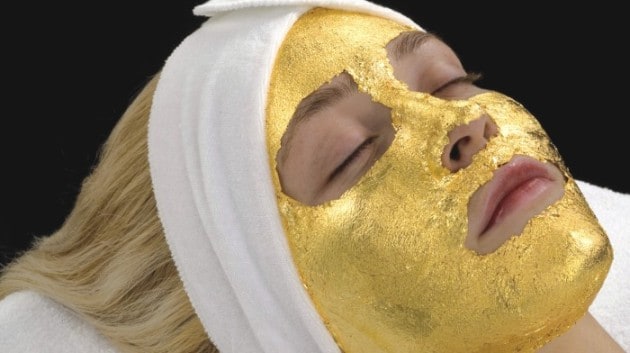
Using gold for enhancing beauty is not new. Even Ayurveda recognizes it as an anti- aging treatment. It is used for removing toxins and wastes from the skin.
It is also well known for its tan removal properties. And like all other facials, it leaves the skin soft and supple.
Procedure
- For cleansing, use the cleanser provided in the kit. The cleanser contains marigold extracts which are known to open up the pores and remove dead cells from the skin. Use the cleanser for not more than 2 minutes and then rinse it off. Warm water is preferable.
- Using the gold scrub provided in the kit, scrub your face for 5 minutes and wash off with lukewarm water.
- Next step in a gold facial is massage, a massage or gel may be provided in your kit. Massage for around 10 minutes. This helps in maintaining good blood circulation. This cream consists of gold-dust, saffron and sandalwood powder.
- Now apply the gold mask given in your kit all over your face for about 15 minutes. 15 minutes are sufficient for gold foil, aloe vera gel, wheat germ oil and turmeric powder to penetrate through your skin and perform wonders.
- Icing
3. Pearl Facial
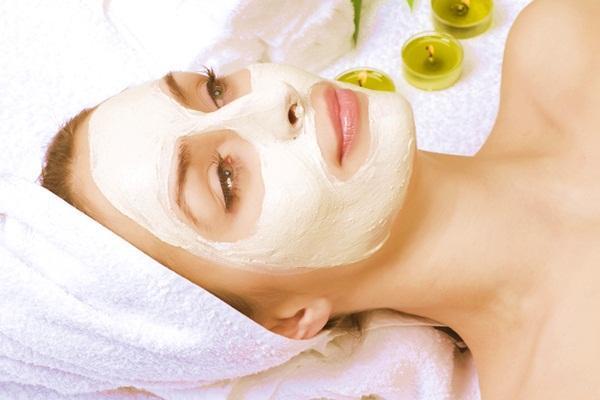
Pearl facials are particularly useful for people with oily skin.People with sensitive skin should avoid it as it contains mainly pearl dust which may cause allergy.
Pearl is well known for its tan removal properties along with its skin whitening and anti-aging properties.
Procedure
- Cleansing can be done with the help of any regular face wash or milk.
- Next step is to apply pearl lotion on your face provided in your kit. Massage that lotion on your skin for 5 minutes and then wash it off with cool water.
- You will be provided with pearl powder in the kit. Take that powder in a bowl and add rosewater to it. If you have normal skin, you can add milk to it. Stir well to make a thick paste. Apply this paste on your face and leave for 10 minutes. After that slowly massage it and rinse it off.
- Now apply the pearl cream on your face using your fingertips. This will give you a soothing effect. Wash away this cream using water dipped cotton.
- Finally the pearl pack. Mix the pack with rosewater and apply it on your face. Keep for 15 minutes or until its dry and after that rinse with fresh and cool water.
You may also add additional steps to your facials like massage and toning.
Massage helps in reducing the wrinkles and pigmentation, which means if you want to look young that get your fingers rolling on your face. You can either buy a massage cream or make your own by the following procedure
Facial For Dry Skin Strawberry Cream
Take fresh strawberry pulp and mix it with a teaspoon of cream. Mix them well and massage your face with this.
Facial For Oily Skin Lemon-Honey Cream
- Mix honey, gram flour and lemon juice in a suitable proportion as to obtain a smooth paste.
- Mix them well and massage your face with this.
- Toning is done after cleansing to obtain back the normal pH of the skin.
- They help to absorb any extra oil left over after cleansing.
Usually and unknowingly many of us perform cleansing and toning in the same step. Tea is a natural toner. Boil tea in water (preferably chamomile tea) for 5 minutes and your toner is ready. Even applying lemon juice on the skin will work as a toner.
An important point to take care is, before trying any facial you must take a patch test on your skin. You never know you may be allergic to any of the constituents and precaution is always better than cure.

