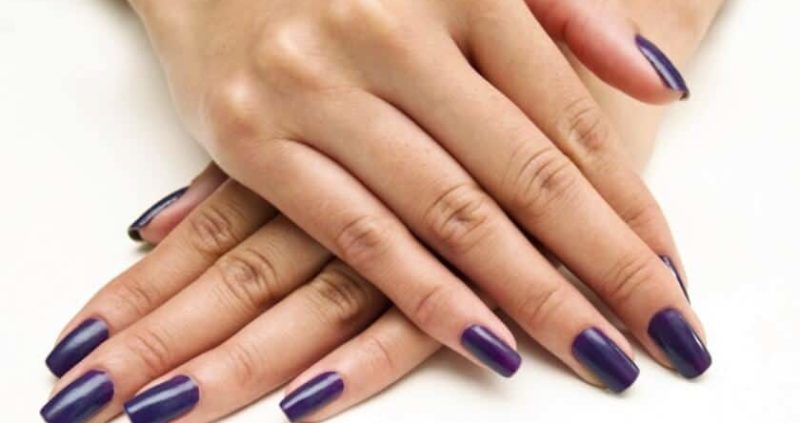
Yes, you can do the manicure at home to pamper yourself and get beautiful soft hands. Follow this guide for the perfect manicure at home without putting a big hole in your pocket.
It is the best care and cure of the delicate nails, fingers, and hands. Manicure is a household word nowadays for many societies.
To know the Origin, the word “Manicure” is derived from the French word Manicure meaning “care of the hands“; In Latin Manus meaning “hand” and cure meaning “care“. A wiki fact as well- Manicure began 5,000 years ago!
Manicure is a beauty treatment involving the use of certain cosmetics, performed either at a salon or at home. It involves filing/ shaping of the nails along with pushing and clipping, removing of dead tissues followed by a fine massage and a pretty nail polish or an eye-catching nail art.
Table of Contents
Explore A Little More
The first thought that comes to the mind now is to visit a Ravishing Salon for some pampering but take a look at the Risk Factors before you jump into a decision.
- Research and Suggestion from various Doctors reveal frequently visiting the parlor for a manicure leads to skin infection, viral and bacterial formation in the nails.
- The simple reason being a proper hygiene is not maintained. In the procedure cutting and filing of your nails take place, which might definitely not ooze out blood but does spread infection if the cutter and filter are not distilled well.
- Also, a scrubber is used for the skin and repeating the same material can spread skin infections.
- And nothing can forgive the humiliation put forward by some nosey beauticians.
- S. at some point in your life, you have experienced gossip about you on your face and you are still trying to forget it or fight that it wasn’t about you in a Beauty Parlour.
How To Do Manicure At Home Naturally?
But why to worry when you at home can give yourself the best treatment in a hygienic way to increase your quality of life.
Also, Manicure at Home costs a lot less than the parlor. All you need is a generous helping hand and a KIT which you can purchase from any shop or from online shopping websites.
Preparatory Steps
- KIT
- Nail-polish remover
- cotton swabs
- Nail clippers
- Nail filer
- Hand scrub and scrubber
- Cuticle pusher and nippers
- Cuticle Remover
- Hand moisturiser
- Base coat
- Nail polish
- Clear topcoat
- Towel
- Tumbler & water
Step 1: Clean The Ground
Remove the nail polish previously applied. Use an acetone-based nail polish remover of a good brand. Yes, when it comes to beauty products brand matters because of the quality. A harsh remover may cause irritation to the skin.
Step 2: Soaking & Shaping
As the nail polish remover dries the nails or in general the nails remain hard it is necessary to soften them before shaping. So soak your fingers in a tumbler of lukewarm water for a few seconds. This also helps to prevent breakage of nails.
Then wipe your hands gently using a towel and clip your nails in the desired shape using a filer. Metal or extremely coarse nail files should be avoided as it causes splinters. You can choose a gently abrasive emery board or a crystal nail filer.
There are various shapes such as round, oval, and square in the corners. Just take care they are smoothly buffed from the sides and the top.
Step 3: Relaxing & Scrubbing
This is the best & the therapeutic part of the manicure. Take a tumbler of lukewarm or warm water as per your desired temperature and pour the cleanser available in the kit. Soak your fingers for about 3 minutes. Remember over soaking damages your cuticles.
Also, scrub your hands using an exfoliator. It helps remove dead skin and soften the hand. Then pat dry using a towel.
Step 4: Cleaning & Trimming
A trick to treat yourself- Beforehand applies the cuticle remover for a few seconds as it helps the trimming process go faster & smoother, especially when cutting away the thick skin around the nail.
Using the cuticle pusher, gently push the cuticles, and remove excess callouses but don’t push too far else it can damage your nails & tear or rip off the cuticles.
Go slow and be kind to yourself as the cuticle protects the nail bed from bacteria. The nippers can be used here. Also, remove hangnails from around the sides of the nail, but be careful not to cut the skin.
Step 5: Moisturizing
Now that the hands and fingers and nails are clean and supple. It’s time to hydrate them by using a rich creamy or milk moisturizer to make your skin look perfect. A good oil can be also be used instead to replenish the skin. Massage well till you feel relaxed.
Step 6: Nail Paint
The moisturizer left on the nail may not allow the nail polish to stick, so use a cotton swab to remove the excess moisturizer. Dip the swap in water or in a Nail polish remover to remove the residue.
Now glam up your nails by applying single color nail paint or doing a nail art by even putting rhinestones or spraying/airbrushing using a stencil.
Remember if you have brittle nails, first, apply a base coat ( transparent nail polish) and then go for the prime color in at least 2 layers, allowing the initial layer to dry before applying the next one.
A base coat protects nails from chipping and staining.
Touch up the manicure by applying a transparent top coat as the last coat cause if it’s about nails, NAIL POLISH STEALS THE SHOW!
STEP 7: Patience
Dry up your nails well using a fan or a cool blow dryer. Never use a heater or heat emitting hot blow drier as the polish will chip and peel.
Also don’t keep your nails too close to the fan as it will create bubbles in your nail polish and ruin your hard work.Once done drying, reapply the moisturizer to maintain the essence and keep your skin healthy.
Even at Home, you can try out the different types of manicure as listed below and hence decide what you wish to do to thyself-
- BASIC MANICURE
- FRENCH MANICURE
- REVERSE FRENCH MANICURE
- AMERICAN MANICURE
- HOT OIL MANICURE
- PARAFFIN WAX MANICURE
Also Read:


