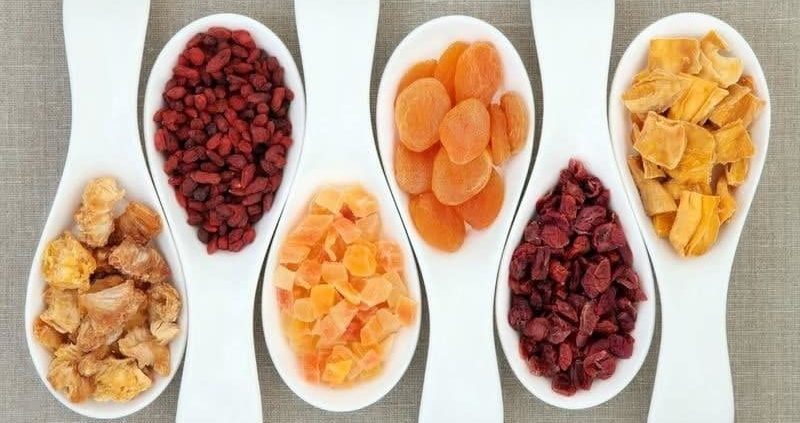
Drying or dehydrating food is the easiest method of preserving food. We are using this method for centuries. The process works by removing water or moisture content from the food items.
You want to dehydrate food at home. But you don’t know…
What is the process of dehydrating food?
What types of food can be dried?
Then you are at a right place.I’ll guide you how you can do so.
Moisture removal makes them soft and light in weight. They don’t lose their nutritional value and taste after drying. Drying won’t improve the quality of fruits or vegetables but, will make the food item to last long. Dehydrated foods
Drying or dehydrating food is the easiest method of preserving food. We are using this method for centuries. The process works by removing water or moisture content from the food items. Moisture removal makes them soft and light in weight.
They don’t lose their nutritional value and taste after drying. Drying won’t improve the quality of fruits or vegetables but, will make the food item to last long. Dehydrated foods last for months to years. However, you should take utmost care while drying and storing dehydrated food products.
Table of Contents
How Will Dehydration Preserve The Food Items?
Food when kept as it is for a day or two gets spoilt. It is due to the microorganism or enzymatic reaction within the food. These microorganisms grow in sufficient amount of moisture that comes from the air and within the food.
Thus, if we remove the moisture the microorganisms won’t grow and our food won’t get spoiled. The dehydration process works on the same concept. Removing the moisture content does not allow the microorganisms to grow and thus preserve food.
In What Ways You Can Dry Food?
These are process of dehydrating food. You can dry the food products in variant ways. There are three prime ways of dehydrating food.
They are as follows.
1. Sun
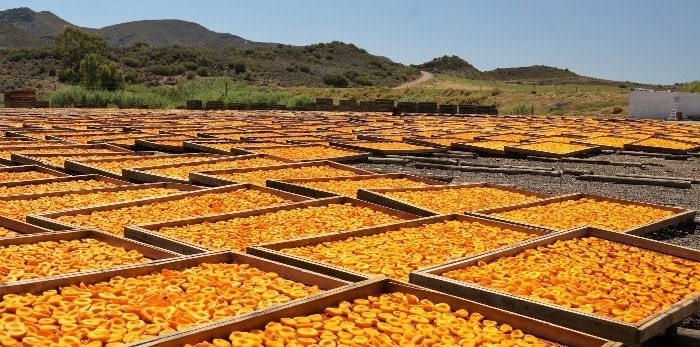
You can dry food in the hot sun. Nonetheless, it requires a temperature of 85°F or higher for absolute drying. It’s not only the temperature but also humidity that matters. Drying requires a low amount of humidity.
Take extra care when drying food outside in sun. It should not attract insects or dirt. Always bring the food inside before night, as at night it may absorb the moisture and increase up the drying period. Try covering the food with a cheesecloth when drying outside.
2. Using An Oven

You can dehydrate in the oven but, the temperature varies with food items. You have to cautious with the temperature settings.
It is the simplest way to dry food because don’t need any special equipment. It is also faster than sun drying. The only disadvantage is out can use a small batch at once.
A regular kitchen oven can hold only 4 to 6 pounds of food at once. For oven drying, most of the food item is reset to a temperature of 140 degrees.
Never use the broiler unit of an oven as it dries up the top trays too quickly. Keep flipping the food item after every hour.
Generally, it is recommended to keep the oven door slightly open. Keep newspaper or block of wood to keep the door open and allow the moist air to come out. For some food items, an electric fan is kept in front of the oven door helps to keep the air circulating.
Do remember to circulate or shift the trays when drying in an oven. It prevents under drying of the top trays and over drying of the bottom trays.
3. Using A Food Dehydrator
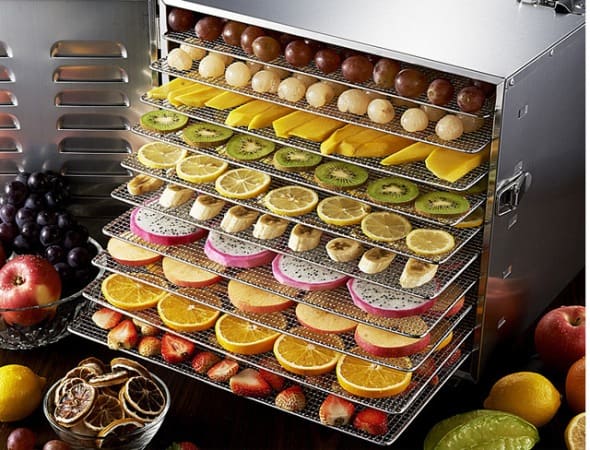
You can dehydrate a food in a dehydrator effortlessly. It’s the most convenient way of drying food items. They take less time and give perfect results. A commercial food dehydrator does the job automatically in few hours they have inbuilt heat and ventilation controls.
They can dry a large amount of food at once. Different models have different costs. They require less effort and consume less electricity than drying the same amount of food in an electric oven.
However, they work on lower temperature of about 120 degrees F to cause even and uniform drying. The food dehydrators are available online and offline too.
The price varies with size, heating elements, and the additional features. You can buy a food dehydrator by following food our food dehydrator buying guide to start a healthy life.
What Types Of Food Can Be Dehydrated?
You can dry anything from fruits and vegetables and to all non-vegetarian food items. More off, you can also dry spices, herbs, snacks, and weekly meals.
You can prepare Natural fruit leathers and meat jerky’s using a dehydration technique. For drying food items, extra should be taken while selection. Select the food items that are great in quality and are fully ripe.
You should not prefer not drying items that have high-fat content as they don’t dry well and are more prone to spoilage. Next, you should be cautious while drying and storing the food items. Always store the dried food in the refrigerator.
It takes times to learn the full procedure of drying. You are not going to be a perfectionist in the first attempt. After multiple attempts, you will get to know the perfect drying conditions and ways. However, the best and easiest way to master the technique of food dehydrating is using Food Dehydrators.
Food Drying Process
Now, let me tell you how to dry different foods using different techniques. You can use any of the mentioned technique to dry the food items. All of them work well and give perfect dried foods.
How To Dry Fruits?
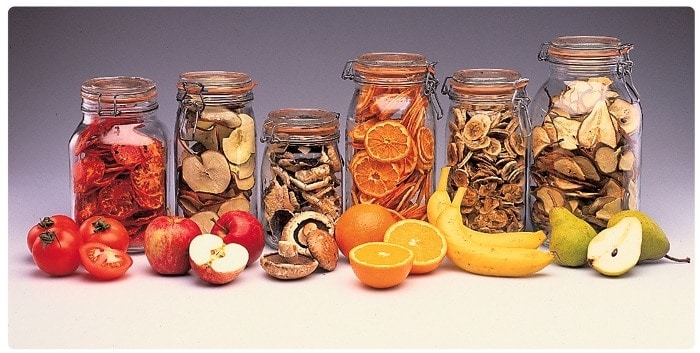
You can choose any fruit for drying. The only constraint is the selection. Select ripe and high-quality foods for drying. It’s best to dry seasonal fruits.
It is because you can use them throughout the year especially when they are not available in the market. The most commonly dried fruits are apples, apricots, bananas, coconuts, cherries, dates, peaches, pears, pineapples, dragon fruit etc.
You have to peel, core, and slice the fruits before drying. Fruits with pits, like apples, peaches, and apricots, are cut into two halves and pitted.
However, most of the fruits do not need to be peeled before drying. Fruits with tough skin like pineapple are to peeled. Always cut the fruits into uniform pieces or slices so that it will dry more evenly. Try cutting out thin slices as they are perfect for drying.
Most of the vegetables and fruits require a pre-treatment before drying. Its an essential step for perfect drying. The second step is drying. You can dry them in sun, in an oven or in a food dehydrator.
1. Pre-Treatment Process
Pre-Treatment is must as it prevents the food from browning and kills the enzyme activity during the drying process. Stopping the enzyme activity retains the flavors of the fruits and vegetable.
Fruits are pre-treated either by blanching or sulfur treatment. Different fruit requires different pre-treatment methods.
Both the methods are described below:
a) Sulfur Treatment
Not all but some of the fruits need pre-treatment with sulfur to prevent browning of food during the drying process. Sulfur protects the Vitamin A and C and retains the fresh fruit flavor. Fruits like apple, peach, pear, nectarine, orange, apricot etc are to be given a sulfur pre-treatment.
Sulfur won’t preserve food but, discourage the growth of insects and microbes that cause spoilage. Sulfur forms sulfurous acid on combining with the water in the fruit. However, the acid evaporates on drying. It’s absolutely a harmless process. This treatment can be done in two ways.
First is sulfuring, which results in minimal loss of nutrients. This treatment is done for fruits that are going to be sun-dried as it would evaporate the bad smell of sulfur fumes. In this method, sulfur fumes are used. It is more efficient but takes more time.
For this, you need a wooden box and wooden trays covered with cheesecloth. Inside the box, you have treated the fruits with sulfur fumes. The treatment time is different for different fruits. Be cautious while carrying the treatment as sulfur irritates nose and eyes.
The second method is sulfur dip or solution. It’s easy, you just have to prepare a sulphite solution. To make the solution, add 1 to 2 tablespoons of sodium bisulfite to 1 gallon of water.
Mix the ingredients thoroughly. Next, soak the fruits in it for 5 to 10 minutes. Submerge the fruit entirely to prevent uneven sulphuring. At the end, drain the pieces of fruit and then blot them dry on absorbent towelling.
Never rinse the fruits with water after sulfur treatment instead, start drying immediately. The only disadvantage is the pieces are less sulfured and sometimes the fruits absorb some water which again has to be dried.
The fruits dehydrated by this method can be dried indoor or outdoor as per the availability. Be cautious, use only pure reagent or food-grade bisulfite. Never use practical-grade bisulfite or garden-dusting sulfur as it may be harmful.
b) Blanching
You can blanch almost all the fruits. Blanching can be done in two ways steam blanching or syrup blanching. Syrup Blanching helps in retaining the color of food fairly well during the entire drying process.
You can syrup blanch apple, apricot, fig, nectarine, peaches, plums etc. For preparing the syrup, mix 1 cup sugar, 1 cup light corn syrup and 2 cups water. Bring the mixture to boil.
Add the fruits and simmer it for around 10 minutes. Next, off the flame and let the fruit sit in the hot syrup for around 30 minutes. After this, rinse the fruits in cold water, pat them on a paper towel, and keep them for drying.
Steam blanching helps retain the color and slows the oxidation process. However, it alters the texture and the flavor of the fruit. For this boil water, keep the fruit on the wire basket or steamer over the boiling water.
Cover the vessel entirely and begin timing. Make sure, the fruits are evenly blanched. Keeping flipping for the same. When done, remove excess moisture using paper towels and place on dryer trays.
2. Drying Process
After this, you are ready to start the drying process. You can sun dry them, dry them in an oven or on a food dehydrator. For the same, arrange the pre-treated fruit on the drying tray. If drying in an oven or dehydrator, make sure the trays are around 2 inches apart for even drying.
For all the fruits, the oven temperature should be kept at around 140 degrees. Additionally, if the fruits are too juicy cut them into halves. When drying in an oven, it is recommended to keep the oven door slightly open. The most recommended way of drying is drying in the dehydrator.
The time required for perfect drying depends on the type of fruit and the method of drying. The minimum time required for drying is 6 hours when cut into thin slices. More off, fr large juicy fruits the drying time can range anywhere from 12-38 hours.
Additional factors that affect the drying process are temperature and humidity. Once the fruit is dried it looks leathery. After completing drying, cut the fruit and make sure there is no moisture left inside it.
3. Consumption Of The Dried Fruits
Dried fruit may be eaten as it is. You can combine them in your daily salad, meal, smoothies, juices or can eat them like a snack.
However, if you want to use it for preparing a meal, soak it in cool water for about one hour. Alternatively, you can even boil the fruit for around 10 minutes. Once the fruit reconstitutes you can use it for preparing any dish.
How To Dry Vegetables?
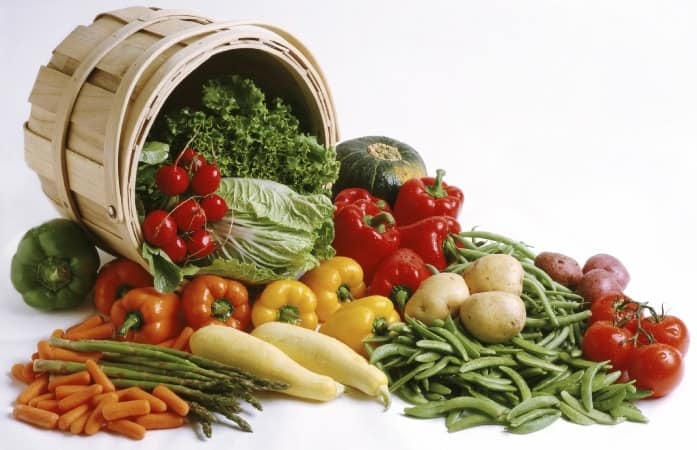
You can dry any type of vegetable. The most commonly dried vegetables are beetroot, spinach, carrot, radish, okra, onions, parsley, green leafy vegetables, pumpkins, potatoes, zucchini etc. It’s easy to dry vegetables at home. Prefer drying seasonal vegetable because you can use them when they are in the off-season.
It’s not preferable to choose every vegetable for drying. Beans, peas, and soybeans are best when partially dried. Experts say you should freeze carrot, turnip, beet, broccoli, asparagus, and pumpkin rather than drying them.
You can use a combination of vegetables to dry at once. However, you should make a combination of vegetables that require the same drying time. You should dry the vegetables with a strong odor together. Never dry a mild odor vegetable with a strong odor vegetable as the mild one can absorb the strong the odor.
Be careful, when selecting the vegetables for drying. Choose pure and fresh vegetables. After selection wash the vegetables thoroughly with water. This will remove all the dirt. Next, remove any extra black spot or additional roots.
Further, cut them into small and thin pieces. It is because small pieces dry off faster and are uniformly dried. Once the cleaning and cutting are done, start off with the drying process. Like fruits, vegetables require a pre-treatment before drying.
1. Pre-Treatment Process
Most vegetables need to be blanched before drying to stop enzyme activity and browning. Blanching the vegetables kills the spoilage organisms, shortens the drying time of some foods, and protects vitamins C and A during storage.
However, there is one disadvantage with blanching. It washes off the water-soluble nutrients and at the same time protects a handful of major nutrients. To minimize the loss of nutrients don’t over boil the vegetables.
Blanching is done for almost all the vegetables. However, a few vegetables like mushrooms, okra, and onions don’t need to be blanched before drying. For blanching, put the required amount of vegetables in a large amount of water.
Boil them for the required time. Blanching time lasts from anywhere between 3 to 10 minutes. Vegetables like beets, carrot, parlsey, spinach, corn, radish, garlic, mushroom, onion, peas, and okra require around 3-5 minutes of blanching time. Potatoes require a blanching time of 6 to 8 minutes.
Once the vegetables are blanched, put them under cold running water for the same length of time recommended for blanching. Drain them well and blot the pieces on a paper towel to remove the excess moisture.
2. Drying
Next comes the drying part. You can dry the prepared vegetables in an oven or in a food dehydrator. For the same, arrange the thin cut slices of vegetables on the drying trays. When drying in an oven or a dehydrator, leave a gap of 2 inches. it is to cause even air circulation and drying. It also gives the space for rotating the trays.
When drying in an oven, keep the door open slightly and use an electric fan. However, with food dryers fan is not needed as they are already equipped with a fan for ventilation.
For all the vegetables the oven temperature should be kept at around 140 degrees. When drying stir the pieces of a vegetable about every half hour so that all surfaces are exposed to the air. It is preferable to shift the trays around on the racks periodically for even and uniform drying.
Almost all the vegetables take from 4 to 12 hours to dry. More off, vegetables like potatoes, okra, onion, pumpkin, and peas take as long as 20 hours of drying time.
Furthermore, the length of time depends on the kind and amount of food being dried and the method of drying. once the drying is completed, the vegetables turn hard and brittle. The dried vegetables shatter when hit with a hammer.
3. Consumption Of The Dried Vegetables
You have to reconstitute the dried vegetables for consumption. However, it’s not a compulsion to soak the dried vegetables before cooking them, but soaking will shorten the cooking time.
For reconstitution, soak the dried vegetable in a large amount of water for around an hour.
Vegetables after thawing return to almost their original size and shape. You can use them in your soup, meal, and salad after reconstitution.
How To Dry Meat?

Drying meat products is a common practice for centuries. In early days, smoking and salting were the common methods of drying meat.
Nowadays, more advanced methods are used to increases the shelf life and nutrients value of the meat products. The dried form of meat is commonly known as Jerky.
jerky is usually made by drying in an oven or dehydrator. Sun-drying is not preferred. It is one of the most popular snacks. You can prepare it at home too as store-bought jerkies are usually high in cost. Drying meat is a long process. It is done in a number of steps.
1. Pre-Treatment Process
You can dry any lean meat. Most of the people dry beef, fish, chicken, and version. Select fresh lean meat and cut off all the fat and the connective tissues. Removing the fat prevents spoilage. Prefer freezing the meat before cutting it as it eases up the slicing process.
After this, cut them into thin, long, and even strips. These strips should be 1/8 to 1.4 inches thick and 4 to 12 inches long. Thins slices fasten the drying process.
Additionally, you can season the slices with salt and paper as per your taste. Don’t go for seasoning that is too strong. The marinate for making Jerky’s contain lean meat, 1/2 cup soya sauce, 2 tablespoon of Worchestershire sauce, 1/2 tablespoon of pepper, garlic powder, ground ginger, and 2 tablespoon of flavored salt.
Mix all the ingredients in a bowl and add the strips. Coat the strips thoroughly with the marinate. Place the seasoned meat in a glass, plastic, or stainless steel bowl and cover it. Keep the marinate overnight in the refrigerator at 40F. Next morning, remove the strips and blot off the excess moisture.
More off, you can prepare your own marinate as per your liking. If you want the sweet and sour taste, you can add teriyaki sauce, sweet and sour sauce, or hot chili sauce.
Never add oil to the marinade as it will become rancid and spoil the meat. Make sure you are giving an ample amount of time for the meat to absorb the marinate flavors.
2. Drying
Oven Drying
When drying in an oven, arrange the strips of meat on the rack. Make sure don’t overlap the strips. Leave space at the edges of the rack to allow circulation of air evenly.
Set the oven temperature at about 140-150 degrees. Keep flipping after every half an hour to prevent sticking of food to each other.
Prefer opening the door of the oven slightly so as to allow the moist air to escape and to control the oven temperature.
You can keep an electric fan in front of the oven door to help the air circulate easily. This will shorten the drying time. Prefer keeping aluminum foil at the bottom of the oven to catch flowing water. Generally, it takes 12-14 hours to completely dry the meat in an oven.
Drying In A Food Dehydrator
It is the best-preferred way of drying meat. it’s easy and takes less time than an oven. Cover the rack with aluminum foil. Leave an inch space around the foil to allow the hot air circulation. Place the slices of meat on the racks.
Turn the strips of meat over occasionally to keep them from sticking to the rack. Flip the sides of the strips after every hour.
Never dry meat and other food items together as the other item may absorb the strong odor of the meat. Drying in the dehydrator will take around 8-12 hours depending on the type of strips and marinate chosen.
Smokehouse Drying
You can dry jerky’s in smokehouse as well. For the same, you have to lay them down or hang it from the ceiling of the smokehouse. The only trick in a smokehouse is setting the temperature. You have to start the temperature at 80F and should gradually increase it to 120F.
However, it will require 24-48 hours to get the desired drying. In the smokehouse, you can use any hardwood for smoking.
However, you should never use pine, fir, or conifers as they create black smoke which may go and stick to the strips. Prefer keeping aluminum foil or a metal tray under the meat to catch the drippings. It is very crucial as if the drippings are allowed to go in the fire, it will bum and produce an unpleasant odor.
Air Drying
You can dry the meat jerky’s only if you live in dry and hot weather. Weather which is not too hot and has humid is not fit for preparing meat jerkies. You have to place the strips on the grill of an outdoor barbecue or on a stand which can hold the tray.
Alternatively, you can even string them on a hung rope for several days. Always, bring the meat indoor before nights otherwise the meat will absorb moisture.
Nevertheless, sun drying is not the preferred way. You should opt for the above three methods for preparing jerkies. It is so because the meat strips when sun-dried catch dirt from the air.
3. Test The Dryness
You should always dry it for the required amount of time. never under dry or overdry. Don’t wait till the meat becomes too hard. Check the finished product.
It should be dark brown or black and feels hard and dry. You can even blend the dried strips to check the dryness. It should break like a twig.
Always check the dryness, after the jerky cools down. The finished product is about a fourth of the original weight of the meat.
4. Storing
After drying, pat off the strips on a towel to remove any melted fat. Next, let it cool down. Store it in a clean airtight glass, plastic or metal container. Choose containers that have airtight lids. Prefer storing the containers in a cool, dry place.
The prepared jerky’s will last for months. However, they start losing texture after few months. You should never prepare a high amount of jerkies at once. Prefer preparing them after every two months as they will retain the taste and nutrition.
5. Consumption
You can consume the jerkies with salt or pepper. Additionally, you can even prepare salads, soup or meal with the jerkies.
How To Dry Herbs?
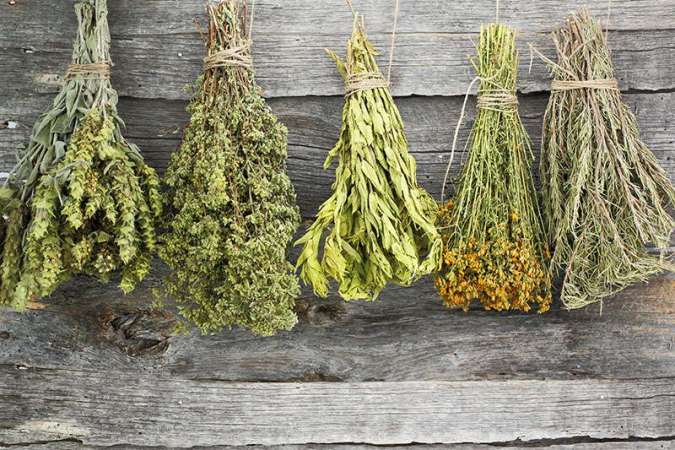
Herbs are nutritious food products with excellent health properties. They have subtle flavors and delicious aroma. You should always dry herbs and keep them handy for making daily aromatic meals. Drying them is the most inexpensive way of storing herbs throughout the year. Herbs only add flavor to the meal. They don’t have any calories.
You can even grow and then dry the herbs. Growing herbs is easy and takes less time. The most popular herbs that are dried are thyme, mint, sage, rosemary, bay leaf, parsley, oregano, chilli, chives, and chervil.
For drying, choose young, tender leaves as they are more flavorful and aromatic than the older leaves. For drying the herbs, carry out the following steps
1. Pre-Treatment Process
Cut the stalks from the leaves. Use tender small leafy tops and flower cluster. Discard the leaves that are below 5 inches from the stalk.
It is because they are not too flavorful and sometimes contain the mud part. Additionally, discard any dead or discolored leaves. After selection, wash the selected leaves with cold water. It is must to remove dirt from it. Next, blot them dry on a paper towelling.
2. Drying Process
You don’t need a food dehydrator for drying herbs. You can dry them easily in an oven or in an airy room.
Air
You can easily air dry herbs. For drying herbs, tie 8 to 6 stems together in a small bunch. Take the bunch and wrap them in a brown paper bag to protect them from direct sunlight.
Don’t wrap it too tightly, make sure the leaves are not touching the sides of the bag. Make several holes in the paper bag to allow good ventilation. You can dry herbs in a warm dry airy room. They dry in about a week or two.
Remove the leaves from the dried stem. Keep the leaves on a tray away from sunlight. For getting best results, cover the leaves with a mesh screen. Stir them occasionally to cause even and uniform drying. Never, sundry the herbs as too much light may destroy the aroma.
Oven Or Microwave
For drying in an oven, place clean, fresh leaves on the rack. Spread them so as to allow easy circulation of air. When using multiple racks, build a gap of approximately 1 inch between the two rays. Set the oven to a minimum setting when drying herbs.
Keep the door slightly open as done with other food items. Never keep a fan when drying herbs as the herbs will fly off. It hardly takes 2-3 hours for drying herbs.
Alternatively, you can use your microwave too for drying herbs. For this, place the herbs on the paper towels and set them on the rack.
Close the door of the oven and dry them for good 2-5 minutes. Check for dryness, if the leaves are brittle and scramble up easily than are good to go.
If not done microwave them for one more minute. This is the easiest and fastest way of drying herbs. You can do it on spot in no time.
3. Storing
After drying the leaves, remove them from the stem and scrumble them up. Scrambling or crushing is best as crushed leaves are easy to store and keep the flavors for a longer time.
Store the dried herbs in glass or metal cans or small airtight containers away from light. It is because storing them in cool and dark place retains the flavor for years.
Storing in a warm or damp environment may hamper the flavors and cause caking or color change. Don’t use these herbs for more than a year.
4. Consumption
You can consume them in ay way whichever you want to. For releasing the full flavors, cut or chop the dried leaves into fine parts before adding it to the food.
You can even crush them on your palms. However, if you want the best results, add the herbs to the liquid in the recipe.

