Are you thinking of getting a microdermal piercing done this new year? Yes? Then this microdermal piercing debrief is going to tell you everything you need to know!
Microdermal piercings are the new “in” thing in the body art market. You can put these studs almost anywhere on your body. Let us first have a look at what microdermal piercings are.
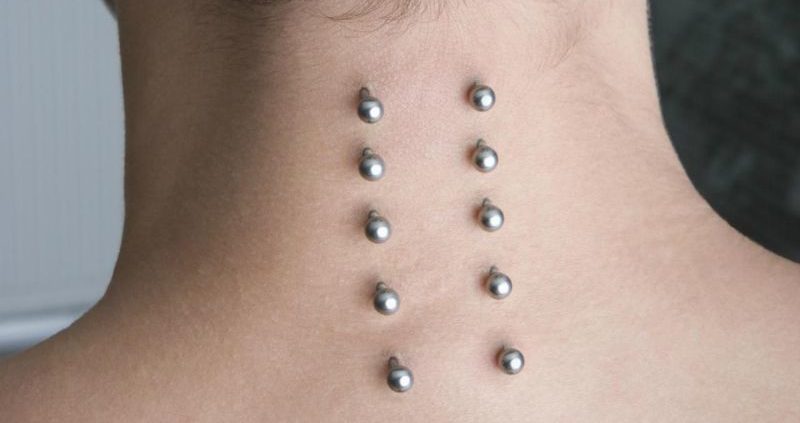
Microdermal piercings are also called dermal piercings or single-point piercings. These piercings are installed on the flat surfaces of your body.
Table of Contents
Difference Between Microdermal And Ordinary Piercings
Microdermal piercings are much different from the ordinary, mainstream body piercings. The ordinary ones have exit and entry points for the piece of jewelry.
In microdermal piercings, only one end of the jewelry emerges out from the surface of your skin. The other end is rooted in the dermal cover of your skin.
This gives the surface of your skin, an appearance of having beads on them. It is becoming a rage nowadays because it enables jewelry to be placed on any flat surface of your body. This allows decoration of the areas which regular piercings does not allow.
Various patterns can be done with more than one microdermal piercings.
In this article, we are focusing on the piercings made on the hips, chest, neck and your back.
Microdermal Piercing With Needles
Getting a microdermal piercing is analogous to any other conventional piercing technique. The area for the piercing is first sterilized with a surgical scrub.
An L-shaped pocket is then made on the insides of your skin instead of a hole. This pouch holds the anchors and the base plate of the piercing.
The anchors are placed with care, using forceps. The jewelry is then screwed onto the plate. The entire procedure should only be done by professionals.
This is because microdermal piercings are more difficult than conventional piercings.
The anatomy of the client’s skin and the location of the piercing determines the size of the needle used.
Microdermal Piercing With A Dermal Punch
Microdermal piercings are usually done using a punch. This makes the makes the process less painful and much safer than using a needle. The pouch is made differently when a microdermal piercing is done with a punch.
The pouch on your skin is made by removing a bit of tissue. The anchors, base plate, and jewelry are then added. The protective mechanism of the punch prevents the piercing from going far too deep into your skin.
But, it is not legal for any non-medical personnel to use these punches in some countries.
How Much Should Dermal Piercing Cost? What Are Dermal Piercing Prices?
The prices will differ depending on the following factors:
- Where you live.
- Placement of the jewelry.
- Kind of jewelry you want.
In India, the costs are a little more than the countries like USA or UK. It is because in India, the demands for such piercings are less. Indians usually go for the conventional kind of piercings.
Any kind of a microdermal piercing treatment in India costs something between Rs. 1,500- Rs. 5,500. The prices of the jewelry pieces are add-ons.
Common Areas To Have Microdermal Piercing
It is a known fact that you may have microdermal piercings anywhere on your body. But, you must not forget that you should be careful with your choice.
Some of the few choices of places are:
i. Hips
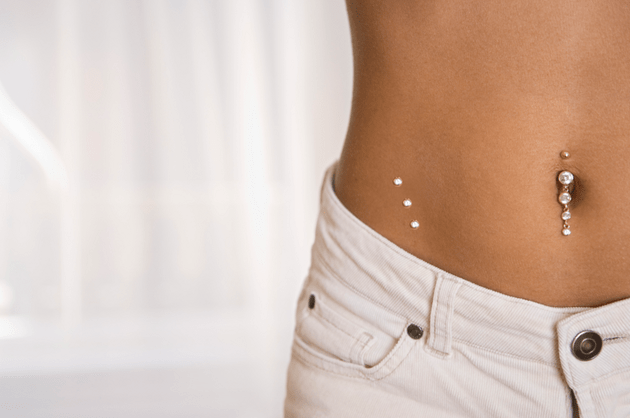
Microdermal piercings on the hip are becoming trendy with every passing day. You can opt to have piercings on both the sides of your hips. The piercings can be placed in line with your navel to create a sense of equilibrium.
You can also decide which on a piercing design or a pattern. For instance, a beaded pattern along your waistline. Remember one thing! Once you have piercings done, you should be careful while sleeping, dressing, or sitting.
ii. Back
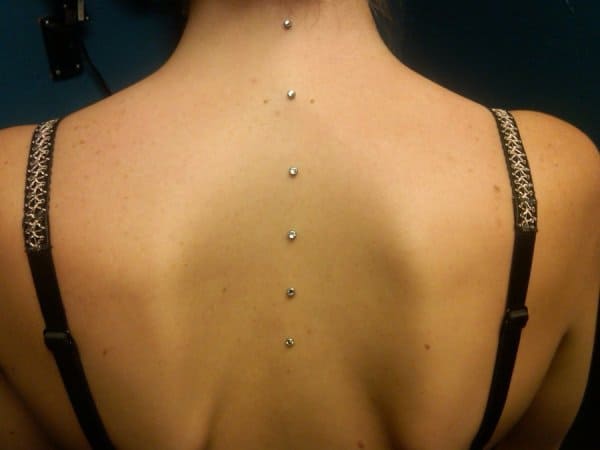
Another location you might consider for a microdermal piercing is your back. You are free to have it anywhere on your back. A lower back microdermal piercing is more popular. You can also make patterns like arrows and monograms.
iii. Neck
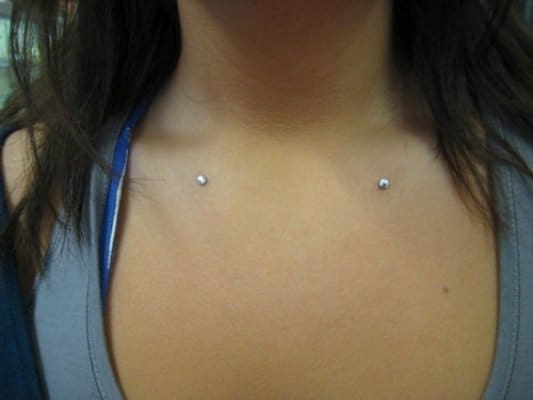
You can try a microdermal piercing on your neck or your collarbone. Piercings can also be done on the back of your neck just below the hairline or create a necklace like a pattern. Mild swelling and redness may take place if you have a piercing on your collarbone.
It is because that area has a lot of blood vessels. You can also have a pattern or a single stud in your throat.
iv. Chest
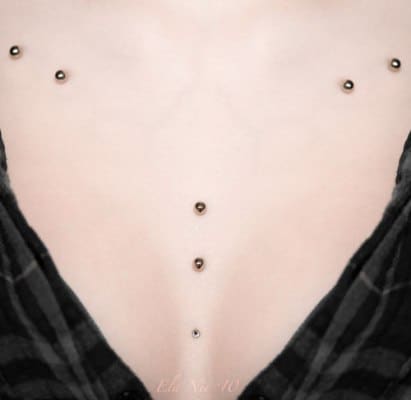
Having a microdermal piercing on your chest is moderately painful. The chances of a rejection are slightly higher as well. You can have studs embedded on your cleavage or just above your sternum bone.
You must also be careful so that the jewellery doesn’t get stuck in your clothing.
The Pros & Cons Of Microdermal Piercings
The best thing about microdermal piercings is that you can place it almost anywhere on your body.
You can get a microdermal anchor or a teardrop microdermal stud embedded below the area of your eye.
You can also create a necklace around your neck or a diamond-studded at the base of your neck.
You can also have a tattoo along with a few twinkling dermal tops.
You can draw an outline of your hip. All in all, the options of getting a microdermal piercing is not restricted. This is the problem you face when you get the conventional piecing.
Microdermal piercings have only one drawback – they are prone to rejection and migration. Every now and then the dermal jewellery can get caught in your clothes and get dislodged. Good and hygienic aftercare is a must.
You have to baby your microdermal piecing, while it is healing. If you’re playing sports, you must cover the piercing with a soft, breathable bandage.
When the piecing gets rejected, there are chances of your skin having a scar forever. In some cases, there is permanent loss of tissue.
Improper sterilization of the needles and punches may lead to infections and diseases, like Hepatitis B.
Microdermal Piercing Aftercare
If you want your microdermal piercing to heal well, you must practice good aftercare. It is more than keeping the area clean and protected.
You need to practice good hygiene, sleep well, eat well and avoid nicotine. Nicotine slows down your body’s ability to heal.
A microdermal piercing is a wound, just like a cut or a surgical incision. You must take care of your body to start the proper healing process.
Try touching your piercing as little as possible during its healing time. Whenever you need to touch it to clean it, you must wash your hands with antibacterial soap.
You can also put on a pair of gloves.
Never use soap in that area! In fact, try avoiding soap altogether. It delays the healing process.
Use saline wash or homemade salt solution twice a day to clean the area.
Saline serves as a natural healer and your body is more tolerant of it. It is hydrating and soothing, and it encourages healing.
You can also use tea tree oil, which acts a natural moisturizer an antiseptic.
If you are using a store-bought saline wash, use it twice-daily. First, soak a cotton ball in the solution and add a few drops of tea tree oil. Gently dab the cotton against your piercing and hold it for five minutes.
You can also use a little bit of turmeric powder along with the saline solution. Turmeric works as an excellent antiseptic and prevents any sort of infection.
If you think that the piercing is getting infected, look for the signs first. The signs of infection take in red streaks and thick, yellowish pus, around the piercing. The skin also remains a little hot to touch.
It is advisable that you go see a doctor immediately. You will probably need a few antibiotics for its treatment. Remove your piercing if your doctor recommends it.
Handling Dermal Piercing Problems
Even with the utmost care, sometimes problems may arise with piercings.
Here are some common dermal piercing issues and how to deal with them if they happen to you:
a. Crusties
Whenever your body is trying to heal a wound, a white substance called lymph is excreted. Lymph dries off to a whitish crust on piercings, forming the “crusties“. They are a common complaint with the healing process.
Crusties is a natural part of the entire healing process and there is nothing to worry about. You can simply soak cotton in the saline wash and wipe off the crusties formed. You can also use cotton swabs or tissue papers.
b. Displaced Dermals
If you bump your dermal piercing, either of the two things can happen:
- The piercing might be pushed below the rim of the fistula (piercing hole).
- It might be pulled out a little.
You must make an appointment with the piercer right away if either of these two happens. He/she should be able to fix your piercing or re-do it if you have pulled out the dermal anchor from top to bottom.
You need to treat the displaced piercing as a brand new one. If your piercing gets displaced, you must start from scratch. This has to be done even if you are a month into the entire healing process. The reason is simple.
The tissue that had earlier formed around the base is no longer able to secure your dermal anchor now. The new tissue forms around it so to re-secure it.
c. Hypergranulation
Hypergranulation is a “red bump” that forms around the fistula. Hypergranulation is a sign that your jewelry is too tight.
Let your piercing breathe for a while and avoid keeping it covered. If your piercing is on your hips, the waistband of your pants constantly presses against it.
The pressure of your clothing or your sweating beneath the waistband causes hypergranulation.
Switch to looser clothing for awhile and let your piercing recover. If nothing else works, you can try putting a little space between the dermal anchor and the dermal top.
Another thing that can trigger hypergranulation is dirt/debris getting inside the fistula. Some foreign particle can always work its way inside the dermal piercing, causing irritation. The only solution to these is regular saline washes.
Eventually, your body pushes out whatever is irritating the wound. It is your job to see that your piercing is clean and to make sure that the irritant does not an infection the area.
You must not poke around thinking that you will be able to unearth the irritant. It can be a microscopic fleck of dirt or any particle. The only thing you should do is not to stop your saline washes.
d. Scarring
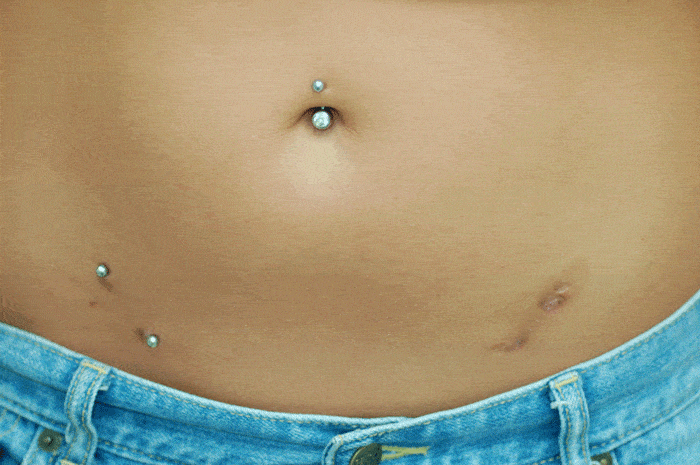
Some individuals are prone to scarring around piercings than others. At times environmental factors can also trigger scarring.
There are two primary categories of scars that develop-
i. Keloids
Keloids are fairly uncommon. Many who have experienced hypergranulation misguidedly think that they have developed a keloid. If nobody else in your family tends to keloids, it’s unlikely that you will be.
This is because keloid scarring is a genetic issue. It is better not to get a microdermal piercing, if you are prone to keloids. You are just going to end up with the scar that needs the help of a dermatologist for its treatment.
ii. Hypertrophic Scars
Hypertrophic scars are more common as compared to keloids. These scars tend to form immediately around the piercing. Keloids grow beyond the piercing site, in asymmetrical patterns.
The Hypertrophic scars are usually small, round and flat-topped. They are also close in color to your natural skin tone. The scars may develop while getting a microdermal piercing or after removal.
In this case, the scars can be treated in the following ways:
- You can try using Jojoba oil. It is a natural skin moisturizer and is known to cut down scarring with regular application. You can apply this twice daily, for as many days it takes to reduce these scars.
- A silicone gel scar therapy treatment can also be done. Do it twice daily to reduce the redness of the scar. Apply moderate amounts of fingers gently around the piercing to eventually shrink it down.
Dermal Jewelry
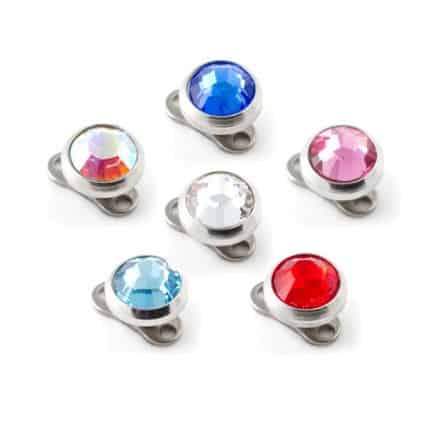
When your dermal piercing heals, you have a wide variety of dermal jewelry to choose from. The jewelry chosen must match with your micro dermal anchor base.
You can choose anything from simple steel and titanium discs to cones or balls.
Flat tops that are shaped like animals and other objects like, stars and moons are also available.
14k yellow or white gold dermal tops are best suited to piercings.
Gemstones can also be one of your choices.
Even though steel is used at times, titanium is recommended for the anchor.
It is recommended that you don’t put heavy jewel tops on your skin. That might have chances of being ripped off when you are going about your daily activities.
Stick to the sizes such as 1.5mm, 2mm, 2.5mm, 3mm, 3.5mm, 4mm, 5mm. Minimalist jewels are the most elegant and look stunning!
To change the jewelry piece, you need to unscrew the previous one you have and replace the new one onto the post. The process must be done with utmost care to avoid any kind of strain on the anchor.
If your microdermal top keeps falling off, you may be using the wrong size or the post might be damaged.
Conclusion
Make sure you think it through if you are planning to get a piercing done. If truth be told, it depends on your lifestyle and where would want the piercing. If you are working with animals or young children, it might be a little problematic.
The visible piercing might be constantly subjected to tugging and brushing. If you play sports, certain piercings might not be allowed. This is because of the possibility of injury. For example, belly button rings or studs are a big NO in sports such as lacrosse.
If you wear a lot of tight clothes you might want to reconsider the placement of your piercing. Piercings must not be constantly put under any pressure.
To help avoid rejection, take proper care once the piercing is done. If you want your piercing to be removed, remember not to do it yourself. Always seek the help of a professional.
If you are a minor, make sure you have your parents or guardians permission. It is illegal for piercing studios to give such kind of a service to minors without any proof of permission.
Lastly, make sure that you do not have any skin problems that might be an issue for the piecing. This will save you the horror.
Before putting on the jewelry you can also opt for an allergy test. This will tell you which metal would suit you the best.
Also, Read
Smiley Piercing, Anti-Smiley Piercing: Healing, Infection, Risks, Pain & Aftercare
Monroe Lip Piercing: Pain, Scar, Infected Aftercare, Healing
Double Tongue Piercings: Procedure, Risks, Healing Time
Belly Button/Navel Piercing Infection:: Causes, Symptoms, Treatment
Dahlia Piercing : Pictures, Aftercare, Healing, Scars
Medusa Piercing Swelling: Aftercare, Scar And Piercing Risks
Cartilage Piercing Infection: Causes, Symptoms, How To Get Of It
Snake Bites Piercing: Pain, Healing, How To Hide
Home Remedies To Get Rid Of Nose Piercing Pain
Home Remedies To Get Rid Of Infected Nose Piercing Bump
Infected Belly Button Piercing Symptoms, Causes, Cure
How To Treat Infected Nipple Piercing?

